Thursday, February 28, 2013

Spiral Ham and Pinto Beans

Mine are like these, but I won't add seasoning until they're cooked.
My daughter was given a spiral ham for Christmas by her new employer. We never baked it because she's not fan of ham. I decided I wanted ham yesterday. I REALLY wanted ham. I could just taste it I wanted it so bad. But, I wanted to do it in my crock pot instead of in the oven. I found instructions online on how long to cook the ham, but I ran into a problem. The ham was too big for the crock pot. Apparently, the one used in the instruction was oval. Mine is round. 

So, I took the crock out since it already had the ham in it and stuck it in the 250 oven and baked it for just over 50 minutes per the regular instructions. It was perfect! It came with a brown sugar glaze, but I didn't put that on it. Instead I made it as a side sauce and used it to dip my ham in.

Today, I cut off the remaining slices of ham from the bone and froze the large end piece of ham. The slices are packed separately and are in the fridge for breakfast, lunch and dinner options (for a day or two - after that, I'll freeze them, too.)

Then this evening, I took the crock that had the ham in it and added a pound of pinto beans to it along with sufficient water for cooking. I am going to have myself some pinto beans flavored with the ham drippings from that Christmas ham. I am looking forward to it.

Right now, I'm thinking of breakfast - scrambled eggs, crisped up slices of ham and a side of beans with a flour tortilla. I don't have any potatoes, but that's OK. I'm better off with the lower carb option. Still, I'm looking forward to my breakfast in the morning. 

Saturday, February 23, 2013

Pan-Seared Steak - It's What's For Dinner

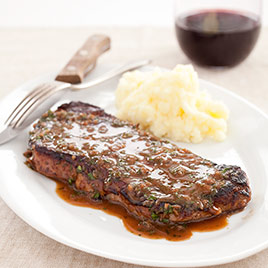
Image from AmericasTestKitchen.com.
Last night, I cooked the first steak I've cooked in over a year last night and it was DELICIOUS!! I guess I'll be needing to pick up a small bottle of red wine just for steaks. Here's why...

I seasoned the steak with steak seasoning (lightly) on both sides and seared it. It was a thin steak, so it didn't need lengthy cooking. I cooked it long enough to caramelize/sear the steak on the one side. When I took it out of the pan, there were loads of tasty bits in there, so I poured a tiny bit of red wine in and one of those Chinese restaurant packets of soy sauce as well to de-glaze the pan and create a sauce. It was just a quick thing - no reduction or anything like that - maybe a full tablespoon of sauce when I was done. But, OMG - that sure did taste good!! The steak, though small, was perfectly flavored (for me). 

The image that I found to use looks very much like my steak last night, although I didn't drink the red wine - I cooked with it. No potatoes with mine, but this is actually a pretty good likeness of what I had to eat.

I don't know why it took me so long to be able to try these kinds of things, but I honestly think it's because of Food Network that I even know about the concepts of de-glazing and the use of wine to make a sauce. My mother's cooking was "farm" cooking. Very basic, stick to your ribs but delicious, foods to fill the belly and taste good, too, were her specialties. I was never really that good at it, but my cooking generally was based on what I grew up on. 

Then, when we got cable, I discovered the Food Network and a whole new world of cooking opened up to me. I still didn't particularly like doing it, but I found myself learning more than I'd ever learned before. If it sounded good to me, I would make a mental note and try it at some point. So, there are still a few techniques that I know about that I haven't tried yet. Until last night, using wine to de-glaze a pan was one of them.

I've never cooked steaks well. They were always overcooked and tasteless. I ran the risk of overcooking this one, too, because it was pretty thin. But, after searing the one side, I barely left it in the pan on the other side so as to not overcook it. I succeeded in cooking a tasty, not dried-out, steak with a sauce that didn't need barbecue sauce to taste good. I was proud of the results. Not restaurant quality, maybe, but definitely worthy of a second go-round in the near future. 

So, thank you, Food Network. My kids may refer to you as "food porn", but you've really helped me think about the cooking of food in an entirely different way even as I stay true to my culinary roots.

Wednesday, February 20, 2013

Impossible Tomato Broccoli Pie - finally!


Well, I finally got the Impossible Pie made! It looks great, doesn't it? See the tomato slices peeking out of the top in the first picture? The only thing I would change is to chop up the tomato slices and drain them better because the overall pie was a bit wetter than it should have been. I'm assuming because of the water in the tomatoes. I also might be able to compensate for that liquid with a little more self-rising flour.


I tried leeching the tomato slices by salting them in a colander, but they didn't really drain. I also added diced onions and some broccoli florets. I put some onion powder in the batter along with some parsley flakes. I still wanted some salt on my own serving because it was a little flat, but I'd rather under spice than over spice. 

I also might lean towards Italian seasoning next time maybe with some pepperoni added on top. The cheese was just enough for this recipe. I'd also rather use a sweeter onion next time than the strongly flavored and fragrant one Deb bought that I had diced and frozen. Even cooked, it's not my favorite flavor.

I didn't pre-cook the broccoli and it turned out good. Because the pieces were small, they cooked all the way through. But, I would definitely want to dice up the tomatoes next time. These tomatoes were pretty fibrous, so they were on the tough side as far as being able to cut through them with my fork. They were plenty cooked, but near the center, they held fast and didn't want to break down completely. Not sure what kind of tomatoes these were, but that might have played a role in it. Maybe next time I'll use the Tommies Snack Tomatoes instead.

So, here's what I did to make this. 

3 medium tomatoes, sliced after coring
3/4-1 cup broccoli florets
1 cup shredded cheese (I used Colby/Jack)
diced onion to taste (I had about 1/4 cup)
3/4 cup self-rising flour
3 eggs
1 3/4 cups milk (I used reconstituted powdered milk)
Any other seasonings you are inclined to add - I used onion powder, parsley flakes, fresh ground pepper and a bit of salt.

Spray a 9" casserole dish with PAM (or equivalent). Prepare the veggies if they aren't already. Layer the tomatoes and broccoli (you can use zucchini or other veggies, too). You can also add a bit of Parmesan cheese here as well. Spread the shredded cheese over the vegetables. Mix up your batter with the flour, eggs and milk. Add seasonings if you want. Pour the batter over the cheese and veggies without stirring, other than to make sure they're covered. Place in a 400° F oven and cook for between 35 & 40 minutes. I took mine out after 35 minutes and allowed it to sit. It was nicely browned, but I wonder what five more minutes might have done for the excess liquid.

So, I hope you try this and maybe even experiment a little. This method of casserole making has just so much flexibility!

Tuesday, February 19, 2013

Breakfast/Dinner - French Toast/Tomato-Broccoli Impossible Pie

French Toast (wheat) with Pumpkin Pie Spice
As I begin writing here, I haven't started making the tomato-broccoli impossible pie. I was going to wash dishes first, but found that the dish washer isn't draining properly, so I'm working on that to see if I can fix it. I really don't want to have to call the landlord if I can avoid it.

Anyway, I made myself some French Toast this morning and it was wonderful. I probably should keep it in the pan just a little longer so that the toast solidifies a bit more in the middle, but I surely did enjoy it. I sprinkled some Pumpkin Pie spice into the egg-milk mixture and it was a much nicer flavoring than when I try using cinnamon. Not sure why - maybe it just mixes better.

Anyway, the photo isn't the prettiest one, but I love how brown it got (not burned) rather than looking overly "anemic" as I've had in the past. I didn't drown it in syrup, so it wasn't too too sweet, either. It was just the right amount of sweet combined with salty. Neither one dominated.

Now I hope to be able to make the tomato-broccoli pie. I've seen recipes for zucchini-tomato impossible pie and I've seen recipes for broccoli impossible pie, so I think I'll just swap out the zucchini for the broccoli. I know the photos I've seen of the various tomato pies look fantastic, so I am looking forward to trying this recipe out - hopefully tonight. I'll be using instructions for self-rising flour rather than Bisquick because that's what I have on hand. I'll finish this post when everything is done.

Well, tomato-broccoli pie didn't happen. I made the mistake of telling my daughter my plans and she expressed her disgust at the entire concept, so I guess I'm going to have to let the end results speak for themselves. I'll have to get it done while she's working tomorrow. I'll be sure to post whatever it is I do. I shredded the cheese already for it, so you'll hear about it when it happens.

Oh, and I seem to have fixed the dishwasher problem by using a vinegar soak and wash to clean it before I tried anything else. Thanks God!!

Monday, February 18, 2013

Stuffed Cinnamon Rolls by Flour Me With Love

Flour Me With Love: Stuffed Cinnamon Rolls

I wish I could tell you I made this and how outstanding they are, but I haven't and I can't. I can only say that they look fabulously outstanding!! 


I'm not into sweets all that much. Haven't been since around 5th grade or so. But, there are times when something like this just screams at me so loudly that it's almost impossible to ignore. I am fortunate that I cannot currently afford to go buy the ingredients for this because, as a diabetic, it's probably not the wisest food choice for me to make. But, I do love cinnamon and I do love cream cheese and I do love doughy treats and this is all that and more!!!

I would recommend heading on over to this web site and checking out this really quite easy recipe (the filling is the only thing you actually need to make yourself) and get to work trying this for yourself!!

Meanwhile, I need to figure out what I'm going to make for supper and get some dishes washed. I hope you enjoy eating this as much as I am enjoying dreaming about it! LOL

Friday, February 15, 2013

Chicken and Dumpling Casserole

This is the recipe I used. Mine didn't brown as nicely.
Well, I did it. I tried a recipe I'd seen a while back but just hadn't gotten around to trying yet. I grew up on my mother's chicken potpie, which is very similar to chicken and dumplings down south except that the chicken is kept separate from the rolled and cut dumplings in the broth. Mom's was downright the best there was and she never made just a little. Her recipe called for SEVEN cups of flour. Yeah - really. And, there were only three of us.

Needless to say, for me it was a daunting task to even consider making her recipe because she'd never made  small batches and I wasn't that good at making the dough. So, she would periodically make drop dumplings in her later years, which she liked almost as much, but I wasn't so thrilled with.

Then I discovered I could make potpie (our kind) using flour tortillas. After all, aren't tortillas just flour dough already rolled and flat? All I had to do was cut them into strips and drop them into the broth to cook. Mom loved it and told everyone they should try it themselves.

So, Mom's gone now and I do once in a while make up a batch of tortilla potpie for myself. My daughter's not quite so fond of the tortilla kind, so I only make enough for me. But, I saw this recipe a while back and kept it in the back of my mind as a potential option for the future. It is called Chicken and Dumpling Casserole.

The original recipe I saw required Bisquick, something I never have on hand. But, just yesterday I found a recipe that called for self-rising flour instead of Bisquick. I knew I had to try it because I had self-rising flour on hand that was never being used except as a gravy thickener. The only thing I didn't have was cream of chicken soup. I did have cream of celery, though. I decided the time had come.

Tonight, I made Chicken and Dumpling Casserole and I am so glad I did. I wish Mom were here because I just know she'd like it, too. As with the pork chops yesterday, I was a little heavy handed with the spice. I used just a bit too much poultry seasoning, but I can cut back the next time. And, I might put a little more liquid in next time, too. But, those two things aside, I was very happy with the results. 

One of the reasons I don't like drop dumplings is because of the dry dumpling in the center. I like the rolled dumplings because they absorb the broth all the way through. Well, this recipe pretty much takes care of that problem. It works much like the Bisquick Impossible Pies where the batter cooks in the broth and puffs up creating a "dough"; in this case, the "dumplings". Because it is poured in as a thick batter, it doesn't really have a substantial thickness to it that allows it to stay dry as it cooks, so it creates a very moist dumpling-like biscuit topping to the base of chicken and chicken broth. 

The recipe calls for ready-made stock, but since I was cooking chicken just for this recipe, I used the stock that I created with that. And, I used that cream of celery soup knowing that there was plenty of chicken flavor in the broth and in the granulated chicken stock it also listed in the ingredients. I really don't think there was much of a difference between the two soups at all that I could claim to recognize. The only thing is that you really don't need to put any salt on the chicken because there's plenty of salt in the stock, in the butter (I don't have unsalted butter) and in the soup. You can always add some if you want when you eat it.

The only thing missing was cranberry sauce - an accompaniment I have always loved with chicken potpie or turkey dinner. I didn't even have any apple sauce, which is an acceptable alternative for me. Quite frankly, there are worse things to be missing. Like dinner.

Wednesday, February 13, 2013

Pork Chops and Green Beans

Imagine a dish like this combined with pork chops!
Years back, when I was still married, I used to buy pork steaks instead of pork chops because they were cheaper and meatier than pork chops. My husband was a lover of pork chops and didn't seem to mind (or notice) the difference. They look very much the same.

One of the ways I would cook the chops would be to score them, pan fry them and then pour stewed tomatoes over them in the pan to finish cooking. I wasn't the best cook, but he seemed to like them and ate them without complaint.

Another dish we would eat (and I still do) was cooking hamburger and adding green beans and tomato sauce. We would serve that with fried potatoes and everyone enjoyed this meal.

Since moving back to New Jersey, I've enjoyed green beans served with marinara sauce in restaurants. I don't like them with garlic, but if they have marinara, I'll order them.

So, this leads me to today's meal choice. I was actually looking for hamburger patties I was sure I had in the freezer when I saw a pack of bone-in pork chops I had frozen in November. Nice ones, very meaty. I took them out and thought the pint of green beans I'd frozen would be a perfect accompaniment. Except, I decided to take it just a bit further. I added a can of diced tomatoes and a sprinkling of diced onions I also had frozen recently.

First, I placed the green beans in the bottom of the baking dish. Then I laid the pork chops on top, sprinkled the onions over them and poured in the diced tomatoes. I topped it off with steak seasoning and a little salt, turned the oven on to 350, put the dish in the oven and set the timer for an hour. When the timer went off, I took the dish out and let it rest for about 10 minutes before taking the first chop out. 

Other than being a bit peppery because I'd used a tad too much steak seasoning, it was really really good. The chops were perfectly cooked, tender and moist, the beans were overcooked the way we like them (if you start with fresh, you probably won't overcook them) and the tomatoes added the perfect additional seasoning to the entire combination. This was all in addition to the fact that the chops were still frozen when I placed the dish in the oven.

Now, the image I used here comes from a blog about Southern cooking and green beans with stewed tomatoes is apparently a favorite. Although my dish didn't include sugar like theirs did, the concept is the same as is the look, other than mine also had pork chops in it. I have linked back to that blog so you can enjoy what they have to offer. I think her beans look divine, personally!

So, here you have another meal I've put together that combines what we have on hand with the fresh vegetables my daughter has brought home from work. Actually, quite a low carb meal, if you happen to be looking for that kind of meal. I wasn't thinking about it at the time, but it's good for me because it keeps my blood sugar from spiking.

I'd love to hear some of your ideas for pork chops, tomatoes and green beans, if you've done anything different from what I did. I'm always looking for new ideas to try that are simple and easy.

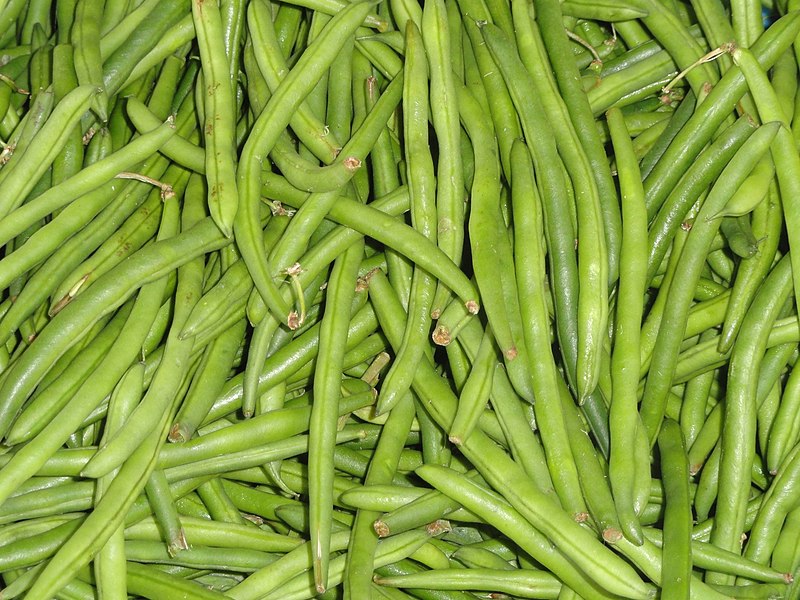
String Beans in the Freezer

Fresh string/green beans (courtesy Wikimedia Commons)
My daughter brought home a huge bag full of fresh string beans the other day along with the snack tomatoes and peppers. I finally got to them yesterday and ended up with 3 1/2 quarts in the freezer! 

I haven't prepped string beans since I was maybe in Kindergarten, so I'd forgotten just how much fun it was (NOT!). That required cutting off the ends, tossing the bad ones and cutting the lengthy beans into smaller segments. It took me just over an hour to get them trimmed and cut up before I could begin cooking them. 

Now, I say cooking them because I chose not to blanch them. I don't have ice to quickly cool them off, so I just cooked them through and froze them in a cooked state. I also added a bit of ham broth to the pot to add some flavor along with the salt I'd put in. 

Of course, once I was done cooking them, my daughter came home from work with a bag full of regular tomatoes. I guess our vegetable supplies aren't going to fall short this year, for sure!

Sunday, February 10, 2013

Pasta Stuffed Peppers!

OK, here I am again, not all that long after my last post. Can you believe it? Well, I actually did something worthy of posting right away and I'm here to tell about it.

I had made the macaroni with the pasta sauce that I used the roasted tomatoes for. There was quite a bit of it and Deb wouldn't eat any of it. I didn't want to eat it all myself, so I thought maybe I could use it for stuffing the peppers she'd brought home that needed to be used. I went online and found that plenty of other people had used pasta to stuff peppers, so I found one that used elbow macaroni like I did in order to know what temperature to set the oven and how long to bake them.

Not my peppers. These are from  Tummy Temptations.
Before I stuffed the peppers, though, I diced up a couple snack sized summer sausages to add meaty flavor to the mix and opened a can of corn, drained it and added that as well. I cut the tops off of five peppers and removed the seeds and veins, got out my square baking dish and placed the peppers in it. Then I stuffed them with the macaroni mixture (that now had diced summer sausage and corn). We had a small block of cheese that I grated a portion of and topped each pepper with a blend of ketchup, dried mustard and chili powder followed by some grated Cheddar Jack cheese. I followed the baking instructions for the one recipe I'd found and in an hour, I had five lovely stuffed peppers waiting to be eaten.

My friend Tom really liked them - he had two. My daughter had one, which surprised me since she had just eaten a hoagie. I haven't had one yet because she had brought me some broccoli soup when she came home, so I was no longer hungry. But, there are still two peppers left and they're now in the freezer waiting to be reheated and eaten. I'm very happy with the results, although next time I'll plan ahead and put pasta sauce around all the peppers so they are more "saucy". I like peppers that way.

Although I'm not providing any specific instructions for this meal, it wouldn't be hard for you to do. Just make up your pasta and then prepare your peppers, stuff them and bake for 30 minutes covered with foil and 25-30 more minutes without foil, all at 350 degrees. I did put a little water in the dish around the peppers to keep them from drying out, but I'd like to put pasta sauce in the next time. If your family doesn't care much for rice like my daughter doesn't, this might just be the recipe for you.

I had one pepper I wasn't able to use for stuffing, so I cut it up along with the "lids" from the five I did use and froze it for future use. This seems to be a good way to use up leftover pasta if you also happen to have peppers.

Saturday, February 9, 2013

Finally - some new food!

It has been so long and no matter how many times I tell myself (and anyone reading) that I'm going to try harder to keep up, it just doesn't seem to happen. Yet, I don't want to give up. So, here I am again with something to post.

My daughter has been working for a fresh produce distributor out of Holland who also develops vegetable varieties of their own. One of their own creations is Tommies Snack Tomatoes. These are specially developed miniature plum tomatoes that are marketed for kids to snack on. They come in little reusable buckets that hold up to four cups of tomatoes. 

She brought home four of these little buckets this week as well as a large bag of fresh string beans and three packs of orange and yellow peppers. We don't cook every day, so I need to find a way to use these things where we're not losing them. We use a lot of tomatoes, peppers and green beans, so if I can prep them right, we will get use out of them.

Well, I went online looking for recipes that use Tommies as an ingredient. They just weren't out there. But, I saw someone describe the Tommies as "grape tomatoes", so I used that as a search term and that's when I came upon this recipe for Roasted Tomato Pizza Sauce. 

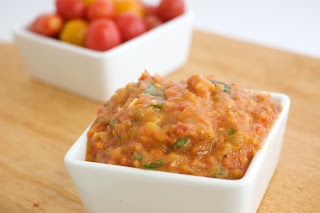
Roasted Tomato Pizza Sauce
 I didn't blend this for sauce after I roasted them, but boy did they smell good and look wonderful!! I ended up adding some ready-made pasta sauce to the roasted tomatoes and then cooked some elbow macaronis to put them all together. I do think I should have added a little sugar to them because they were very acidic, but all in all, it turned out well. I used a potato masher to mash the roasted tomatoes after I added the other pasta sauce. Seriously, it wasn't at all bad - just tangy. I might add a bit of sugar to it before I reheat it tomorrow to cut the acidity.

So, tomorrow I need to cut and blanch the string beans and cut and freeze the peppers. They'll all get used, I can guarantee it. We eat a lot of all of these things.